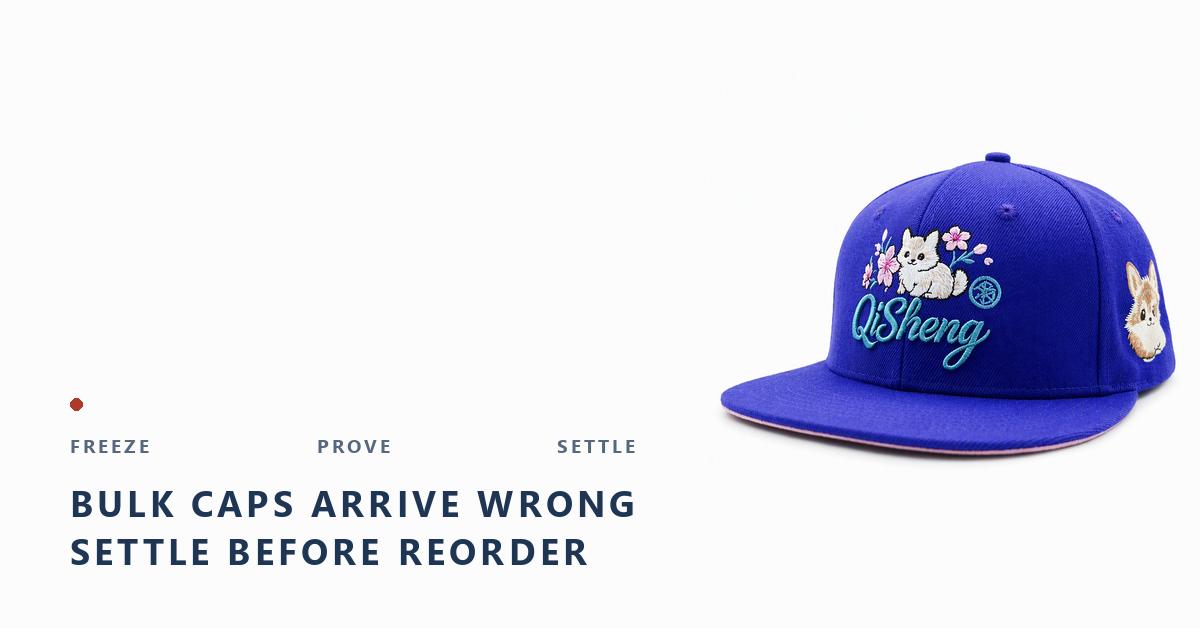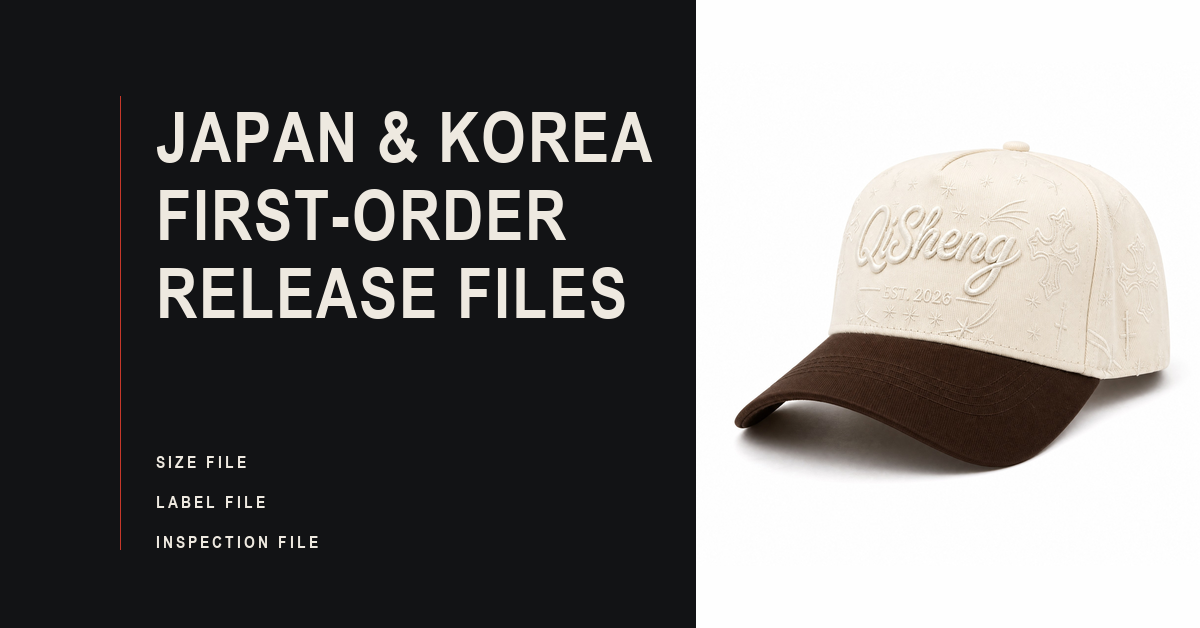


Custom flat brim caps are assembled from roughly a dozen components, and every one of them is something a buyer can write down before the first sample is cut. The crown sets the silhouette. The brim board decides whether the cap still looks flat after a season in a warehouse. The panel count changes how a front logo sits and how much the crown resists a knock. Fix those three early and the rest of the order tends to hold together. Leave them to the factory default and you inherit whatever the previous customer happened to accept.
This walkthrough is for the people who sign a specification: streetwear labels, promotional distributors, apparel brands adding headwear, sports clubs and e-commerce sellers buying 300 to 20,000 pieces. One-off personalized caps belong with a print-on-demand service.
Custom flat brim caps, component by component: what each part controls
Three structural choices separate this shape from the rest of a headwear catalog: a brim that stays flat instead of curving down, a crown that is normally taller and more structured, and a front panel built to carry a large mark. Everything below follows from those three. The table maps each part to what it controls and to the place buyers most often get caught.
| Component | What it controls | Where buyers get caught |
|---|---|---|
| Crown height | Silhouette, coverage and how tall the front panel reads | Approving height from a photo instead of a measured sample on two head sizes |
| Crown structure | Whether the cap holds a shape or slowly collapses | Asking for structure without accepting the extra weight and carton volume |
| Brim board | Flatness, stiffness, and whether the brim survives packing | Choosing board by feel alone: thin board creeps, heavy board fights the head |
| Brim length | Coverage, proportion, and how much of the face is shaded | Copying a length in inches without checking the taper of the board |
| Panel count | Where the seams fall and how a large mark is framed | Placing artwork across a seam with no actual-size sew-out test |
| Buckram or interlining | Front panel stiffness behind a 3D logo | Specifying 3D puff on a crown that has nothing to hold it up |
| Eyelets | Ventilation and surface detail | Eyelet finish and placement left off the specification sheet |
| Sweatband | Comfort, moisture handling and how the cap wears in heat | Width chosen on cost alone, which concentrates pressure on the brow |
| Closure | Size coverage, SKU count and how the cap adjusts | Mixing a metal slider and a plastic snap between two colorways |
The crown comes first: height, shape and what it does to the brim
Crown height changes how a flat brim cap photographs more than any other number, and it is the number buyers most often leave blank. Two caps can share the same board, closure and fabric and still read as different products because one crown measures 9 cm at the front seam and the other measures 11.5 cm. Write the value in centimetres on the sheet, then check it on a head rather than on a table. A tall crown on a smaller head can look oversized even when the circumference is exactly right.
Structure is the other half of the same decision. A structured crown holds its shape through shipping and carries a heavy 3D mark without sagging. An unstructured crown is lighter and packs flatter, but it collapses over time and will not hold a tall foam logo cleanly. Most programs choose structure and pay for it in carton volume and a slightly warmer wear.
Brim board: the part that decides whether the cap still looks flat next year
Nothing disappoints a customer faster than a brim that has taken a set, and the board inside that brim is doing all the work. Board weight and temper drive the behaviour: a light board feels flexible and packs small but waves under load, while a heavy board keeps its plane and adds weight the wearer feels by mid-afternoon. Laminated and molded constructions sit between the two extremes.
Test the choice instead of arguing about it. Ask for a sample packed the way the bulk order will travel, leave it compressed for a few days, then open the carton and photograph the brim within five minutes. A brim that recovers inside an hour is usually fine. One that is still flat-topped after a full day has set permanently, and no re-pressing at your warehouse will bring it back.
Brim length, overhang and the stitch rows that hold the edge
Brim length drives proportion more than coverage. A shorter brim keeps the silhouette tight; a longer one gives more shade and a heavier, more retro look. The number belongs beside the board temper on the sheet, because the same nominal length behaves differently over a stiff board and a soft one.
Stitch rows are the cheapest quality signal on the entire cap. Six rows along the brim edge is the common baseline; eight reads denser and slightly more premium. Extra rows cost thread and machine time, and they also stiffen the edge, which changes how the brim sits against the forehead. Approve the row count and the thread color on the same sew-out you use for the front mark, so both decisions are made together rather than one after the other.
Panel count and seam placement on a flat crown
Five-panel and six-panel constructions are the two usual answers, and the difference shows up where the seams land. A six-panel crown gives a symmetrical, traditional shape with a seam running down the centre front, which frames a centered logo and disappears behind a wide one. A five-panel crown pushes the seams toward the sides and leaves a broader uninterrupted front panel for a large print or a big 3D mark.
Seams are also why a logo can look wrong on an approved sample. Artwork that crosses a seam can distort under dense embroidery, so review the artwork footprint and the panel layout together. Ask for a sew-out on the actual shell at actual size; a paper proof hides every seam problem the wearer will see.
Buckram, interlining and the structure you cannot see
Behind the front panel sits buckram or a comparable interlining, and this layer is what allows a 3D puff logo to stand up. Where the lining stops matters as much as what it weighs. A fully lined crown behaves differently from one lined only at the front, in weight, breathability and how the cap folds when it is packed.
Ask which panels carry lining, what it weighs and whether it is fused or sewn in. Then check the consequence: press the front panel and watch whether it returns, and wear the cap for an hour to see whether the structure leaves a pressure line above the brow.
Eyelets, ventilation and the sweatband
Eyelets are small, and they are the difference between a cap that vents and a cap that only looks as though it should. Metal eyelets in a matched finish read more premium; embroidered eyelets sit flush and suit a softer crown. Put the count, placement and finish on the sheet, because a substituted eyelet finish is one of the most common small deviations found at final inspection.
The sweatband is where comfort is actually decided. Brushed cotton feels soft and takes repeated wear well; a moisture-management knit dries faster in heat; terry absorbs more and dries more slowly. Width matters as much as material. A narrow band concentrates pressure on the forehead and can leave a mark, while a wider band spreads the load and adds a little bulk. Choose the band for the season the cap will be worn in, not only for the unit cost.
The closure decides how many sizes you have to stock
On adjustable custom flat brim caps, the closure is an inventory decision dressed up as hardware. A plastic snap with a strap covers an adult range in a single SKU and is the cheapest way to hold stock. A metal slider adjusts more finely and reads more premium at a higher component cost, while an elastic band removes adjustment altogether and pushes you toward a fitted size run.
If you sell through retail, count the sizes before you choose. A fitted program needs three or four head sizes per colorway, and every size multiplies the minimum quantity you have to place. Many brands run an adjustable main line and add one fitted size for the flagship colorway.
Decoration surface: where artwork is allowed to land
These caps offer more decoration area than most styles, and the area is not evenly distributed. The table pairs each method with the surface it suits and the limit that shows up first.
| Decoration method | Best surface | First limit you will hit |
|---|---|---|
| 3D puff embroidery | Structured front panel with lining | Foam height needs a panel that can carry it, and fine interior detail disappears |
| Flat embroidery | Front panel, side panels, rear arch | Strokes under roughly 1.5 mm break up, so small lettering needs a test stitch |
| Woven or PVC patch | Front panel, side panel, brim edge | Edge shape and attachment add a step, and curved surfaces need a matching cut |
| Screen print | Flat front panel, rear panel, underbrim | One screen per color, and no gradient without halftone work |
| Heat transfer | Front panel with an even surface | Placement accuracy and wash behavior both depend on the shell fabric |
| Sublimation | Polyester-rich panels only | Cotton-dominant shells will not take the transfer |
| Silicone or rubberized mark | Small accent areas | Raised height interferes with stacking and flat packing |
Approve every method on the shell you will actually produce, because mesh, twill and washed cotton all behave differently under a stitch. Settle the artwork footprint before the crown structure, since a large mark on an unlined crown is the combination that fails most often.
Color blocking on custom flat brim caps: how many colors before the price moves
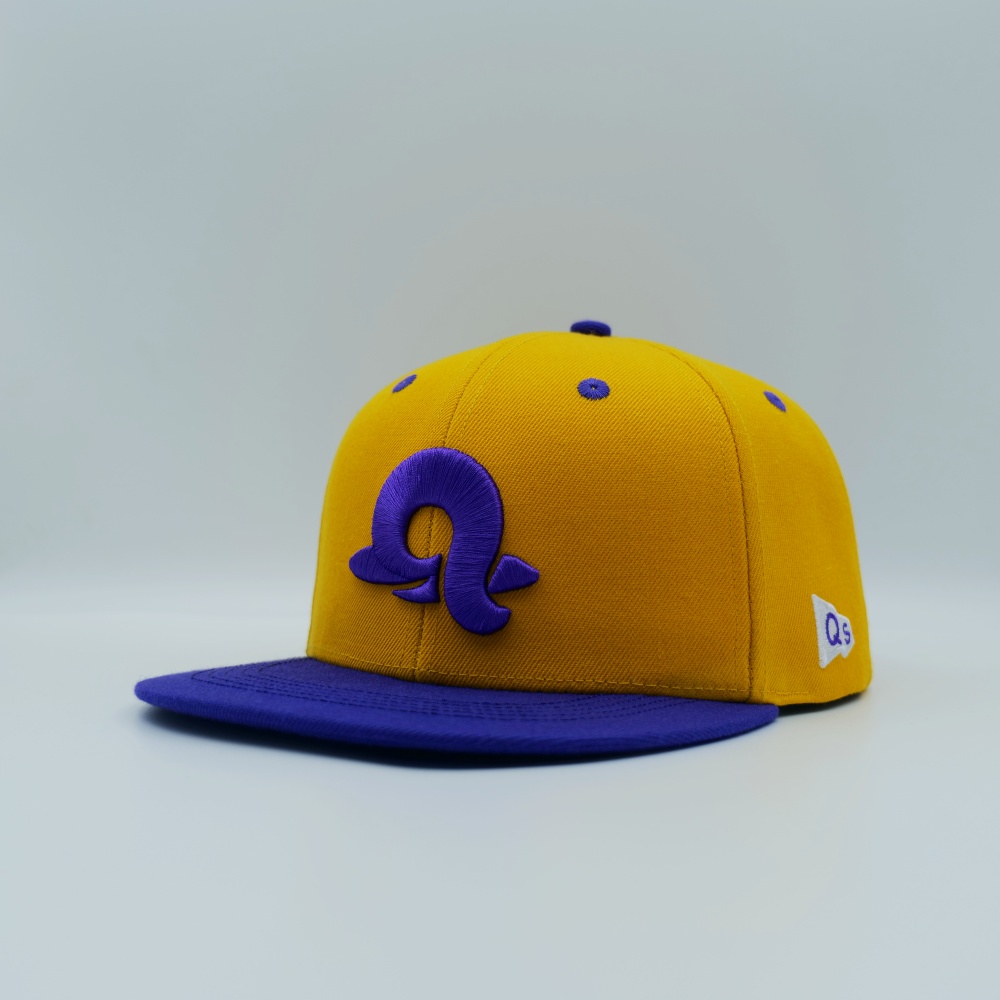
A flat brim cap invites color blocking. Crown, brim, button, eyelets, closure, underbrim and stitch can each carry a different color, and every extra color adds a cutting step, a material to stock and one more chance for a shade mismatch. Cost moves with the design. A two-color cap is nearly always cheaper per piece than a four-color cap at the same quantity.
Ask for a color reference per element and approve them as a group under one light source. Trim is where variation shows most: a closure strap one shade off is invisible in a photograph and obvious in a hand.
A measurement card to send with your custom flat brim caps artwork
Suppliers quote more accurately when the numbers arrive with the artwork instead of after it. Fill in what you know, mark the rest as confirm on sample, and attach the card to the request.
| Dimension | Unit | Usual range | Note |
|---|---|---|---|
| Crown height | cm | 8.5 to 11.5 | Measured at the front centre seam, not the side |
| Brim length | cm | 6.5 to 8.5 | Measured over the top of the board |
| Brim board temper | grade | soft to hard | Name the temper in words as well as a number |
| Brim stitch rows | count | 6 to 8 | Match the thread color to the design intent |
| Head circumference | cm | 54 to 62 | State which size the sample has to fit |
| Front panel width | cm | 17 to 21 | Sets the maximum artwork footprint |
| Closure travel | cm | 12 to 20 | Check both ends, never the middle setting only |
| Sweatband width | cm | 2.5 to 4 | Wider spreads pressure, narrower feels lighter |
Fit checks that only appear once the cap is on a head
A fit check on a table tests nothing that matters. Wear the custom flat brim caps sample for at least half an hour with the audience in mind: under headphones for a skate label, through a warm-up for a club. Three observations cover most of the risk: where the brim edge sits in the wearer's line of sight, whether a pressure line appears above the brow after twenty minutes, and how the closure behaves at the rear.
Record the head size and the hours worn with every photo. A fit note with a size and a duration is evidence you can hand to the pattern maker.
Inspection points, component by component
Every defect in custom flat brim caps can be caught earlier than the final audit if the plan says where to look. Crown symmetry, seam alignment and panel width are easiest to correct before the crown is sewn. Brim flatness and stitch rows should be judged as the brim comes off the press. Decoration placement is cheapest to challenge on the first decorated pieces of the run.
QSHeadwear runs material inspection, pre-production sample approval, in-line monitoring and a final AQL inspection before shipment from its Dongguan workshop. AATCC publishes the textile test methods buyers and factories cite for colorfastness and care behavior, and naming the relevant method in the order saves an argument later. For orders bound for the European Union, fiber composition labeling follows the percentage rules and harmonized fiber names in Regulation (EU) No 1007/2011. Note what AQL is not: it will not define your brim tolerance. You do that.
Sampling, capacity and reorders at QSHeadwear
Dongguan Qisheng Cap & Bag Co., Ltd. manufactures headwear under the QSHeadwear brand for brands, retailers and distributors outside China, with 15 years focused on custom cap production. The company publishes 100+ staff across sampling, embroidery, sewing and quality control, a workshop above 4,000 square metres, and 30+ embroidery machines covering flat, high-density 3D and patch decoration.
Sample development is quoted at roughly 3 to 5 business days, capacity runs at 120,000 to 150,000 pieces a month, and the bulk window is about 15 to 20 days, stretching to 25 to 30 days above 5,000 pieces. Custom flat brim caps can start from a tech pack, an AI or PDF artwork file, or a physical sample, under OEM or ODM terms, with shipping by DHL, FedEx, UPS, air, sea, port delivery or Europe and North America DDP. Confirm each figure against your own specification, then keep the approved sample, measurement card, artwork version and color references in one file so a reorder repeats rather than restarts.
Related reading on the same decisions: the snapback fit and decoration guide, the curved and flat brim comparison, the fitted cap size run and inventory guide, and the wholesale SKU and margin board.
How to send a flat brim brief that can be quoted
A brief for custom flat brim caps answers ten lines: the channel and the wearer; crown height and structure; brim board, length and rows; panel count; closure; sweatband; color blocking; decoration method with artwork; quantities by color and size; packing and the date you need the goods. With those in front of a supplier, the reply is a quotation.
Use the QSHeadwear contact page when you want an order-specific quotation, look at the OEM and ODM services if the shape needs development, and compare reference silhouettes in the product center. Buying custom flat brim caps well is mostly a matter of ordering the decisions correctly: define the parts, wear the sample, write the numbers down and keep the approved piece.
Custom flat brim caps: the questions buyers send us
What makes a flat brim cap different from a snapback?
The board and the crown do the work. A flat brim cap keeps a level brim plane and a taller, more structured crown, while a snapback can be built either way.
What crown height should I choose?
Between 8.5 cm and 11.5 cm covers most programs. Measure at the front centre seam and check the sample on two head sizes.
How thick should the brim board be?
Thick enough to hold a flat plane through packing and thin enough that the cap still sits comfortably. Ask for the target in words and in a grade, then confirm it with a packed-sample test rather than a table squeeze.
How many brim stitch rows are standard?
Six rows is the usual baseline and eight reads denser. More rows stiffen the edge, so decide the count together with the thread color and the board temper.
Can I put a 3D puff logo on an unstructured crown?
It is possible but unreliable. Foam needs backing to keep its height, so pair 3D puff with a lined, structured front panel.
How many head sizes do I need for a fitted program?
Three or four sizes usually cover an adult market. Every size multiplies your minimum order, so many brands keep one adjustable SKU as the volume line.
How long does sample development take?
QSHeadwear quotes roughly 3 to 5 business days for sample development. A first-time 3D puff program, a new patch shape or a fabric that has to be sourced will take longer.
What is the bulk lead time?
Published capacity of 120,000 to 150,000 pieces a month supports a 15 to 20 day bulk window, extending to about 25 to 30 days above 5,000 pieces. Confirm against your own decoration and packing.
Should the underbrim be controlled in the specification?
Yes. The underbrim is the first surface a customer sees when they turn the cap over, and an uncontrolled underbrim color is a frequent surprise at final inspection.
What belongs in the approved sample file?
The signed sample, the measurement card, the artwork version, one color reference per element and the packed-sample photos. That file makes the second order a repeat.